The rollcage took longer than expected to be delivered, but is now fully fitted and ready to be painted before we re-assemble the race interior.
The wiring loom on the left and right hand sides (including the relay board and fusebox) have to be re-attached. The heater unit from under the passenger side dashboard also needs to to be re-installed with appropriate modification to fit around the rollcage bars.
Sunday, 20 November 2011
Sunday, 16 October 2011
Roll Cage
All of the remaining interior trim and dashboard elements have been removed to allow the installation of the rollcage.
The dashboard took a morning to remove and was quite straightforward. How easily it goes back in remains to be seen!
Off we go on our first towing experience!
The dashboard took a morning to remove and was quite straightforward. How easily it goes back in remains to be seen!
The car was winched onto a trailer we hired for the day. We took it to Roll Centre who are fitting the cage for us. The car is so low that extra ramps were needed to reduce the angle onto the trailer and stop the car grounding.
The car had to be put onto the trailer backwards in the end so the weight distrubution was correct. The trailer bed should be flat under its own weight and the hitch end still be able to be lifted easily.Off we go on our first towing experience!
Labels:
modifications,
rollcage,
trailer
Rear Suspension (Part 2)
The used hub assemblies ordered turned out to be in worse condition that our existing ones with both damaged threads and worn wheel bearings. As an alternative we sent the hubs away to be drilled out and time steel inserts http://www.timesert.com/ put in. This is apparently a common problem on caliper, head and spark plug bolts.
Both sides of the rear suspension were re-assembled in a day and the alignment adjusted by eye initially with maximum negative camber and zero toe in/out.
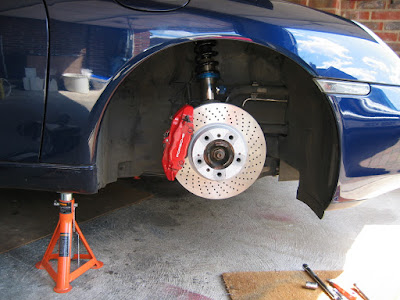
The new discs and race pads installed as per the front. The ride height is adjusted on the spring perches and was set to give us ~10mm above the minimum series ride height (85mm).
We can go lower if we needed but may have to roll the inner wheel arches.
Labels:
brakes,
modifications,
suspension
Sunday, 18 September 2011
Rear Suspension (Part 1)
We started the rear suspension change in the knowledge it would be a substantial job and more complex than the front suspension.
With the car on stands and the wheels off, we set about removing the brakes. The pads came out easily using the rusty pin technique learned on the front suspension change. The first problem came immediately after - removing the brake caliper bolts. On investigation the ends of the bolts protrude through the wheel hub assembly and had corroded badly. This corrosion damanged the threads on the hub assembly.
With two used replacement wheel hub assembly's ordered, the revised task list now included loosening the main hub nut to pull the hub off the drive shafts. This required 5mins of heating from a blow torch, a 32mm deep socket, 1.5ft breaker bar with 2ft extension pole and the force of two adults. It was tightened to 460lbs/ft at the factory with added loctite!
Knowing the job would overrun we moved the car into the garage and spent the rest of the day removing the the suspension and wheel hub assembly.
A large assortment of different size sockets and spanners were needed, plus long ratchet extensions and torque wrenches. The hub assembly came off with use of a pulley puller after a balljoint separator disconnected the suspension arms. One side was completed fully by the end of the day and is ready for the new parts to be installed next week.
Labels:
modifications,
suspension
Monday, 11 July 2011
Front Suspenson and Brakes Overhaul
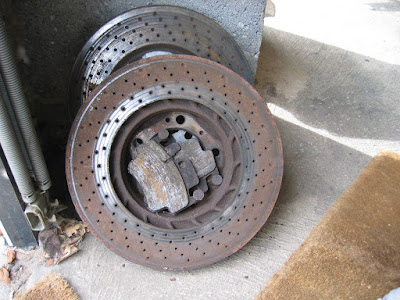
Finally the Gaz Gold coil-over suspension has arrived. These are 2-way adjustable (height and dampening) and come as complete units with springs. Removing the old brake pads took several hours due to he pins being rusted in. The pads and discs have clearly have not been replaced for a long time.
The suspension units were fitted and adjusted to give the maximum negative camber possible, followed by replacement standard vented discs.
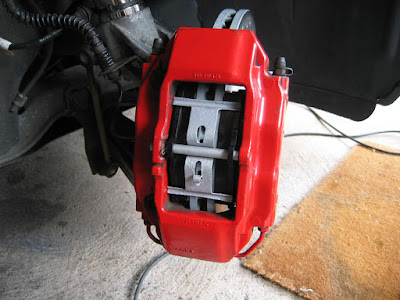
The standard 'Big Red' Bembo 4 Pot callipers were cleaned up. The the retaining bracket and pins had all the rust sanded off and were painted in aluminium rust proof paint. Mintex racing brake pads were fitted.
Labels:
modifications,
suspension
Monday, 20 June 2011
Dashboard Modifications
The steering lock mechanism has been removed to adhere to MSA regulations.
The lock mechanism required the steering wheel, instrumentation, ignition switch and heater vent to be removed to gain access, before we cut the locking pin off with a dremel tool and re-fitted. This looks quite a but more complex that it was and was good practice since the whole dashboard will need to come out when the roll-cage is fitted.
On the passenger side the airbag behind the dashboard panel was also removed and the panel fitted.
 |
The Porsche PCM Radio & Sat Nav unit has also been removed and will be sold. The area is blanked with a carbon fibre sheet and will have the interior safety cut-off and fire switches mounted to it as well as re-instating a button for the horn. The lower fan control unit is being retained.
Labels:
modifications
Saturday, 28 May 2011
Hardtop
Boxster Hardtop is needed to comply with regulations. Previously running with opens tops was permitted, however the cars look a bit odd with no roof and a rollcage in place.
Labels:
modifications
Sunday, 22 May 2011
Interior Strip and Race Seats Installed
Next stage of the conversion is to strip the interior and fit racing seats, steering wheel and harnesses. The driving position needs to be fixed before the roll cage is installed and is a compromise position for the two drivers. The carpets, seats and seat-belts were first removed.
The Porsche steering wheel with air-bag mechanism was removed and replaced with a Sparco Suede Racing. The Porsche PCM radio / sat-nav unit is still in the dashboard and will be removed soon.
The race seats replacing the standard Porsche ones are Corbeau Pro-Series seats which are embroidered with the Boxster racing logo's. The Boxster seats and runners were extremely heavy with their electric motors and heating elements. These were sold to a man restoring a VW camper van!
Additional eye-bolts are fitted through the chasiss with spreader plates underneath. These provide fixing points for the fitting of 6-point FIA approved Luke harnesses.
Custom adaptor plates were made up from 6mm aluminium to allow the Corbeau seat mounts to be fitted to the chassis. Aluminium tread plate has also been installed to provide a solid floor in the footwells.
Labels:
modifications,
seats
Saturday, 12 March 2011
Race Door Panels & Master Switch
Door Panels
The interior door panels including speakers, airbags and door handles have been removed to reduce weight. We have retained the glass windows, and electric motors.
Custom panels have been cut to fit using a plywood template before cutting out carbon fibre sheet. A light weight aluminium door handle and pull strap to open the door are also fitted.
The interior door panels including speakers, airbags and door handles have been removed to reduce weight. We have retained the glass windows, and electric motors.
Master Switch
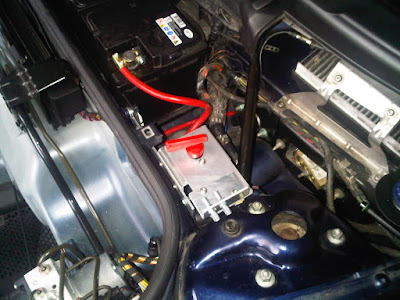
A master battery cut-off switch is needed. The location conveniently next to the battery is taken up by the Air Conditioning drier and alarm siren which had to be removed. The aircon system was then drained and the drier and pipework removed, reducing weight further. The switch is in-line with the battery positive terminal and mounted on a bracket. It is activated by one of two pull switches which will run back to the interior dashboard and up to the scuttle tray under the windscreen. The latter allowing track marshals to activate the switch from outside the car.
Labels:
modifications
Wednesday, 9 March 2011
Track Modifications
After a long gap at the end of 2010, we embarked on the track / race modifications needed for the Boxster. New brake discs / pads have been purchased, adjustable suspension and lightened race wheels ordered. The latter two are built to order and on long lead times.
In the mean time a number of smaller, but important track modifications have been progressed.
Bonnet Pins
The electrically operated bonnet and boot locks have been replaced and aluminium bonnet pins fitted. The pins were mounted through the boot inner and holes drilled in the bonnet. for the surface catches. These are required on the track to prevent the bonnet flying open. We've retained the hinges and gas struts to keep it easy to open the bonnet and boot lid.
Induction Kit
The stock air filter housing and filter have been removed and replaced with a power induction kit in the form of a cone shaped filter, and aluminium heat shield. This ensures cold air is taken from the air scoop on the side of the body and prevents hot air from the engine bay. being inducted. This typically provides ~10bhp increase. The plastic housing of the original filter was fitted before the engine in the factory, it therefore had to be cut out in pieces which was quite a job.
Labels:
modifications
Subscribe to:
Posts (Atom)


